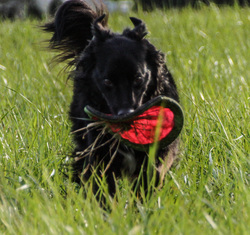
 Tossing a ball or Frisbee straight out in front of you can cause injury as the dog “Power Slides” to stop and turn sharply to bring the object back to you. I realize that not all dogs Power Slide but many performance dogs do unless taught a slightly different game. This post is meant to help you realize that there are slightly different games you can play that decrease the chance of injury but still provide the same outlet for our dogs.
Power Slide Definition: Dog slides across the ground at speed to catch an object and turns sharply to return the object to you. When your dog is diving for a ball on the ground, it can cause injury to the shoulders, back, knees, and elbows as well as can tear stop pads, toe pads and dewclaws as they slide to grab the ball. (I know many dogs with continued shoulder issues due to ball chasing) When chasing a Frisbee with your dog jumping in the air for the catch, it stresses the back and on the landing, can over-stress to the knees. (I know many dogs that have torn cruciate ligaments this way) To reduce the stress on the joints, tendons and ligaments, teach your dog to catch a ball on a low bounce and toss the Frisbee at nose level. See below for instructions on changing to a safer game. In either case, do not toss straight out in front of you on flat ground. This will cause the dog to drive out straight and increase the chance of injury diving down for the ball or jumping for the Frisbee. The sharp turn to come back for another toss, also increase chances of injury to the shoulders, knees and back. “Power Slides” are not recommended. Food or thought: I teach my dogs and clients dogs to “go around me” (right side) and “switch” (left side). The dog drives around behind me and then out in front of me arcing in a big circle. As the dog drives around me in a big circle I toss the Frisbee right in front of their nose so that they do not leave the ground. The dog catches the Frisbee and completes the circle back to me. If using a ball, my dogs will drive out and turn to look at me for the toss. I then toss the ball right into their mouth or they catch it on a bounce. Steps: 1. First teach your dog to go around you by luring with the ball (or Frisbee). With the ball in your right hand, lure the dog while reaching behind you with your left hand to grab the ball from your right. As the dog is following the ball (now in your left hand) coming around your left leg, switch hands again so you can toss the ball into their mouth. (if right handed) 2. Once the dog is following the ball reliably, put it on cue “around” (or whatever makes sense to you) 3. Then repeat starting the dog on your left side, ball in left hand, lure dog behind you, switch ball to right hand, toss. When reliable, put it on cue “switch” (again you can use whatever cure works for you) 4. Then teach your dog to go around a cone (colorful bowl, kids toy, whatever you have handy). Stand next to the cone and ask your dog to go around it. You can lure or even better “shape” it. 5. Make sure to teach the dog to go around the cone in both directions. 6. Put it together. Set the cone out in front of you about 2 feet, ask the dog to “go around” (step#1), indicate the cone (or not if shaping) and toss the ball in his mouth. 7. Repeat at the same distance with “switch” (step #3) 8. Move the cone out 2 feet and repeat until you can get the dog to drive out up 30’, 60’, and 90’ away from you. If need be, as you move the cone away from you, add a couple more cones to keep the dog making a wide circle instead of wrapping around the cone. My dogs have been trained to drive out away from me half a football field. :-) Excellent Strength Exercise Tossing ball/Frisbee UPHILL is an excellent strengthening workout as the dog lengthens and uses their whole body to propel up the hill. The flip side is that it is a great workout for the handler as well. I recommend tossing the ball or Frisbee uphill, then meeting your dog half way on the decent. This way your dog is not barreling down a hill, putting unnecessary stress on their shoulders and back. You can walk with your dog at your side back to the starting point and start again. In this case, when tossing on a steeper incline you can toss so the dog is driving straight because as the dog goes up the incline they are less likely to “power slide” or “jump” due to the upward terrain. Bobbie Lyons, Cert CF email: [email protected] http://www.pawsitive-performance.com/blog  Question: How do I fit 10-15 minutes of conditioning/fitness exercises with my dog, three to four times a week with trialing, training, and life’s crazy schedule.
Answer: IT IS DIFFERENT FOR EVERYONE Let’s looks at a few scenarios: Scenario No 1: Handler has one dog and is involved in 1-2 different canine sports and works a full time job. In this case, find time immediately after a walk in the am or pm to do your strength routine. This is a great time because your dog’s muscles are already warm. If you attend class 2 x a week, fit your strength work in on the opposite days. If it is a trial week, take a day off before and after the trial for mental and physical recover. On trial weeks you may only get in TWO strength days. Scenario No 2: Handler has two or more dogs and is involved in 1-2 different canine sports and works a full time job. Same scenario as above only work with 2 dogs per day after an am or pm walk (to make sure muscles are warm). This is a great time because your dog’s muscles are already warm. I have 4 dogs and I work 2 dogs daily for a total of 20-30 minutes (10-15 min per dog). In this scenario you will get the most bang for your time if work one dog until their entire workout is complete before switching to another dog. If doing your dog’s fitness routine after a walk, the second dog will still be warm when it is their turn. Again try to do strength opposite a performance class day. If it is not possible to do strength opposite a performance practice day, keep the routine shorter (5 or so minutes) so soreness does not occur. I always subscribe to one day off before and after a trial for mental and physical recovery. This is good for both you and your dog. Strength routines can be twice a week when trialing. Scenario No 3: Handler has a high level of commitments (family, kids, a job) and does 1-2 canine sports with 1-4 or more dogs. This one is ME. Often times my dogs get their workouts between 9-10pm at night after my kids are in bed and life has calmed down. I do have to warm up their muscles prior to working on strength exercises so it takes me 5-10 minutes longer to complete their routine. I warm up 2 dogs, and tag team them through exercises. Both dogs will do stability work, then two to three a strength exercises. This way I can keep both dogs warm and complete their routine. There is also times when I can complete their workouts at dinner time after an evening walk. This is truly ideal as then they are not getting more calories. These are just a few scenarios to give you an idea of how it might work. If you do 10 minute trainers that is not the same as the mental and physical commitment of a weekly class. You can pair your strength workout with 10 minute trainers. If you have questions about how to fit in K9 Conditioning/Fitness into your life, please comment below or contact me. I would be very happy to help. Low Impact Exercise that can be done most any time: These low impact exercises can be done as part of your daily routine in life to keep your dog more aware of their body: · Backing up (I back my dogs up down the hallway on a regular basis) · Backing up over objects (UH, my kids leave stuff in the way and my dogs will back up over whatever is there. If nothing is there, I will toss a dog bed out for them to back over) · Holding a square sit on a stool (while dinner is being prepared) · Holding a sphinx down position (while dinner is being prepared) · Go to mat and mat to mat and back up to mat · Perfecting your warm up routine – all low impact active joint and muscle movements. A proper warm up is one of the single most important thing you can do for injury prevention. As you can see there is plenty that can be done on the FLY to remind your dog of their body and remind them to efficiently engage their muscles and if you work out a basic schedule and believe it is a priority, conditioning and strength training can and should fit into your schedule. Bobbie Lyons Bobbie Lyons, Cert CF Email: [email protected] Website: http://www.pawsitive-performance.com/schedule.html 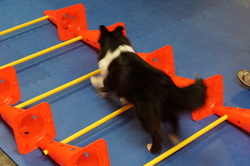 It is important, especially with a performance dog, to understand normal movement and what is not normal for your dog, so you can be proactive about keeping your dog strong and injury free. Many people can see differences in a dog’s gait when watching them move, BUT many cannot or think these things are “normal for their dog”.
And then there is a group of us that can obsess over movement. :-) We don’t see dogs anymore, we see strides, and compensations from injury, pain or discomfort, good or poor muscle development and so much more than, “just a dog”. We see movement that causes a dog to drop bars, pop out of weave poles, why a dog is refusing directional cues and simple things like why a dog sits with splayed rear legs or doesn’t want to sit at all. Knowing when to pull your dog from competition before causing further injury is KEY. Catching an injury in the early stages generally means an easier and quicker recovery time depending on severity of injury. Many dogs will WORK through pain and discomfort. Some dogs will shut down from pain but the owner assumes it is behavioral. It is the human’s job to watch out for their dog’s best interest and make sure that their dog is sound before asking them to perform. I often hear, “My dog limps when first coming out of a crate” or “My dog limps a little a day or two after a three day show”. A dog limps due to pain or discomfort. This could simply be due to tight muscles that need to be stretched out, or could be due to an underlying injury especially if this is occurring over and over. For instance, strained muscles often show as an intermittent lameness. A strained muscle requires a rest (NOT crate rest) for 4-6 week with regular icing, massage and anti-inflammatory medication to recover. If left untreated, this will cause your dog to have compensations in other parts of his body that will cause further discomfort and perhaps more injury. Another issue I see often is a dog that stands with a roached back. I understand that many breeds have a slight rounding to their back that is normal for their structure. However, it is important to know what is normal for your breed or your dog and what isn’t. If a dog’s back is un-naturally roached, is a RED FLAG. This dog may not know how to use their core muscles and be in need strengthening, may have digestive issues or might be VERY tight in the low or mid back. Dropping bars, refusing or popping out of weaves, or unable to turn tightly are all signs of tight muscles in a dog’s back or pelvic regions. Again, is important to know what is normal so you can be proactive in helping your dog strengthen and use their body appropriately. Having said all this, watching your dog move can become an obsession. You can start to see things that aren’t there. It is human nature. Video-taping your dog’s movement is a great way to watch and keep track of differences throughout your dog’s life. If you suspect your dog may have a soft tissue or any type of injury is it important to have your dog looked at by a “Qualified Veterinarian” that has experience with performance dog injury. Soft tissue injury is often very hard to diagnose. In addition, what is normal for a pet dog and normal for a performance dog may be different. It is truly important to really SEE how your dog is moving so that you can take note of differences in their weight distribution or gait change. In a performance dog, a small change in gait can have a profound effect on performance. Bobbie Lyons Email: [email protected] Website: http://www.pawsitive-performance.com/schedule.html
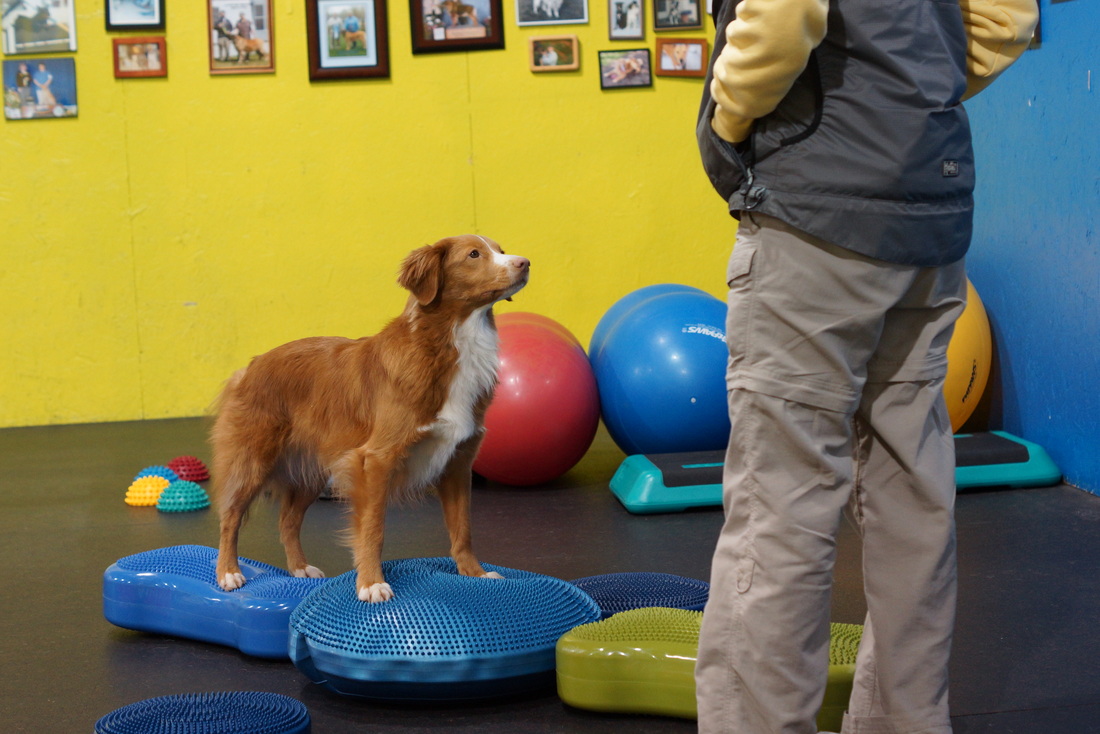
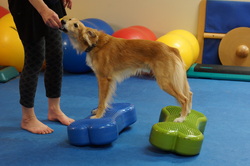
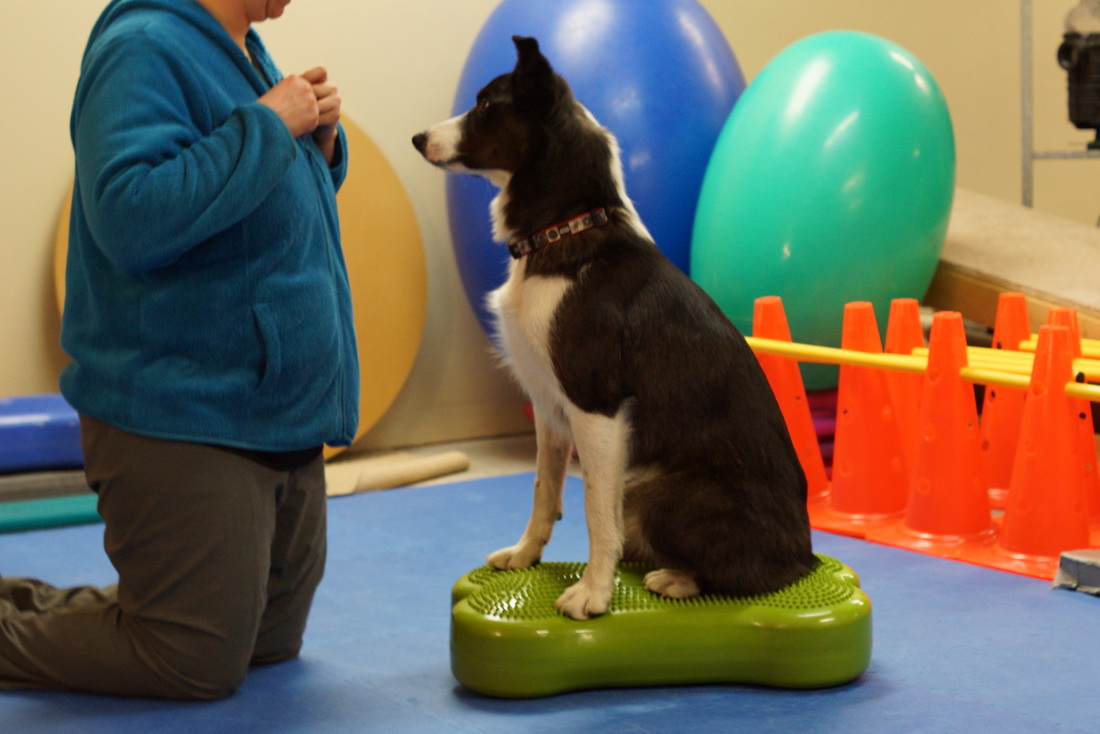
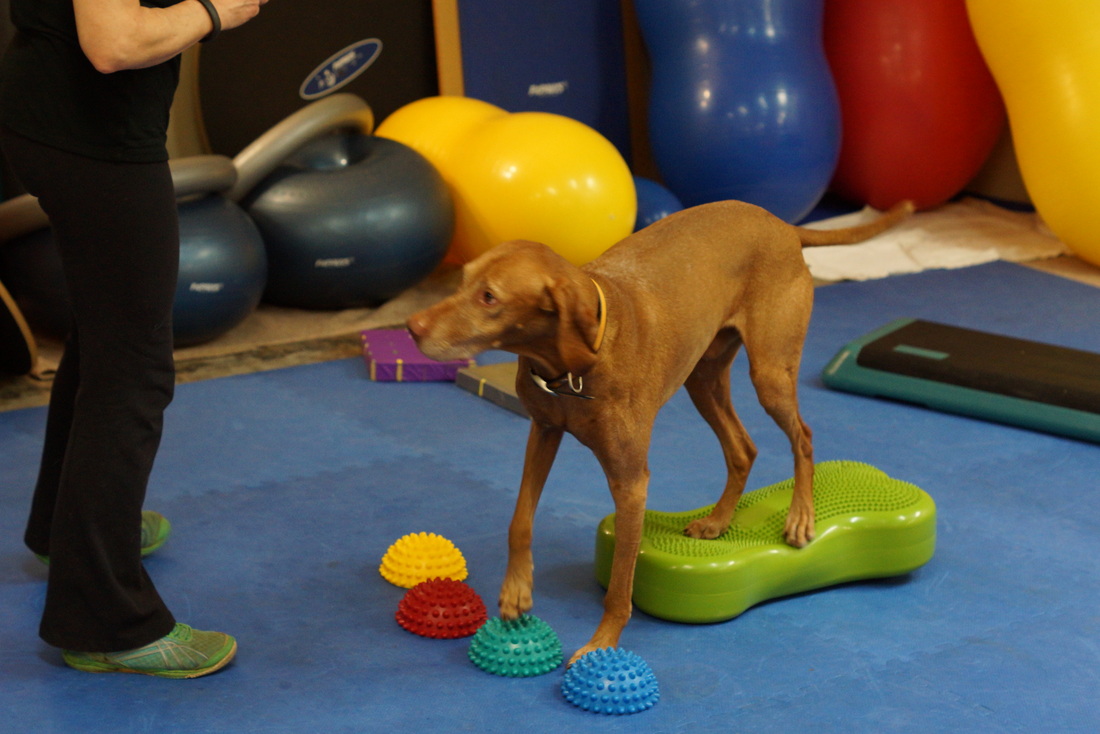
The new K9FITbone is a very versatile piece of balance equipment. The lateral movement the K9FITbone offers encourages your dog to engage their abdominal muscles, the muscles along the spine (core and trunk muscles) as well as the supporting muscles around the hips and shoulders used for stability. Here are 10 reasons that I think the K9FITbone is AWESOME:
1. Keeps knees and rear feet tracking forward. Often I see dogs that toe out while in a sitting or standing position. Some dogs have a lazy sit that developed in puppyhood, they live on slippery floors and/or lack of proper weight distribution which makes it harder for the dog to hold their rear feet and knees tracking forward. I work with the dog to maintain the correct foot/leg position that will strengthen the muscles used to hold their knees and rear feet tracking forward while also encouraging more weight distributed to the rear. The K9FITbone encourages proper foot position in both a sitting and a standing position due to the width of the bone. Even my 50 lb Border Collies can stand and sit on the K9FITBone while maintaining proper foot position and weight distribution. 2. Lateral stability The K9FITbone encourages lateral stability by strengthening supporting muscles around the shoulders and hips. Varying the inflation will make the K9FITbone rock side to side just a little or will be more dramatic by increasing inflation. The material the K9FITbone is made of has a lot of give and with it being 4” tall, it allows the dog to push into the bone to find balance thereby strengthening the major muscle groups that support the dog’s joints. Keeping the dog’s head in a more natural position will help to distribute weight more evenly. 3. Difficulty There are many levels of difficulty that can be obtained by varying the inflation. With less air the bone lays flat but is squishy and can provide resistance for strengthening feet, shoulders and hips. With more air the K9FITBone rocks side to side providing a lateral challenge, engaging the core and spinal muscles as well as supporting muscles around hips, shoulders, knees, wrists and feet. 4. GREAT for Puppies Because the K9FITbone encourages rear feet and knees to track forward, it does not put unnecessary stress on the joints. It encourages a flat back so that the puppy is developing muscles in the right position. This makes it perfect for puppies no matter the inflation rate. 5. Shaping for strength and balance Training your dog to use the K9FITbone requires less handler support and lends to shaping independent behaviors in the proper position. If you use a clicker and love to shape behaviors, this piece of equipment is for you. As your dog gains strength, you can pair the K9FITbone with other pieces of equipment, shaping the dog to stand, down, weight shift and other movements that will strengthen their core, spinal muscles and muscles around shoulders and hips. 6. Target hips or shoulders with two feet on the K9FITbone If you have front feet on the long side of the K9FITbone you can target rear end strength by shifting weight to the dog’s rear legs. With rear feet on the long side of the K9FITbone you can target shoulders, biceps and triceps by shifting weight to the front legs. Position your dog’s feet on the END of the bone and you can engage more muscle groups while challenging your dog to balance laterally. 7. Fabulous for small dogs The material has enough give when under inflated to provide a challenge for smaller dogs as their feet push into the material. It also provides the lateral challenges as mentioned above when air is added. It is close to the floor so most smaller dogs are completely comfortable using it. The handler can also put the K9FITBone on a table and it won’t roll away :-) This allows the handler to stand upright and not bend over or kneel on the floor to participate in a strength program for their dog. 8. Using it with larger dogs Due to the fact that it is 23″ x 11.5″ x 4″ it makes it very difficult for a 35-45 pound dog to find a good position while supporting a flat back but it can be done. Because of the narrow shape and depending on the level of inflation it is more difficult for the dog to find balance which encourages more muscles to be engaged. If you have a larger dog, the K9FITbone can be paired with another bone, balance disc, donut, or paw pods. 9. Encourages a FLAT back Due to the elongated shape, the K9FITbone encourages a flat back when the dog positions his feet correctly. Some dogs have a harder time with maintaining a flat back but I have found that the K9FITBone helps the dog to find the correct position faster than on other equipment. Longer dog??? Use two K9FITbones end to end and still reap the benefits of a flat back, lateral movement, shaping independent strength training etc. 10. Versatile The K9FITbone can be paired with almost any other FitPAWS items; balance discs, paw pods, wobbles boards, rocker board, and even the peanuts and eggs. A note on size: 23″ x .11.5″ x 4″ I get “told” all the time, that the K9FITBone is “not big enough” for the 35-45 pound dog. Since using the K9FITbone I have worked with Border Collies, Australian Shephards, Brittany Spaniels, Labradors, Golden Retrievers, Long Haired Whippets, Corgis (just to name a few breeds) and other mixed breed dogs 30-50 pounds that were all able to stand with front and rear feet a natural distance apart with a flat back. This is easily shown during a private lesson. Larger dogs such as German Shepherds, Labradoodles, Great Danes, Greyhounds and the like can simply use the K9FITbone paired with another piece of FitPAWS equipment or simply use 2 K9FITbones. I have also worked with JRTs, Papillons Poodles, Mini Schnauzers, Mini Aussies, Cavaliers, Cocker Spaniels, Shelties and others who have greatly benefitted from having a piece of equipment that is challenging but requires less handler support. Smaller dogs tend to be more spatially sensitive and this piece of equipment allows the handler to give the dog some room. Bobbie Lyons, Cert CF [email protected]  It is important to pay attention to fitting a harness correctly before purchase. If the harness you choose has a straight strap that lays across the shoulder blades it can impede your dog’s forward stride.
Picking a harness where the straps are made to go around the shoulder or where the strap is above the shoulder is key. Impeding your dog’s forward stride can cause all kind of issues such as: 1. Stress to the spine and neck 2. Poor weight distribution 3. Shoulder injury These are the two harnesses that I like for normal activity such as walks, trotting and hiking. The Original Fleece Lines Harness: http://www.cleanrun.com/index.cfm?fuseaction=product.display&Product_ID=3930&ParentCat=783 Hurrta Harness: http://www.cleanrun.com/index.cfm?fuseaction=product.display&Product_ID=3374&ParentCat=783 Alpine outfitters Flyball harness: http://www.alpineoutfitters.net/scripts/prodView.asp?idproduct=178 Other harnesses like sold by FitPAWS, Julius-K9 and others are GREAT for stationary strength work such as when on the peanut. I personally have several different harnesses for my dogs and use them according to the activity we are involved in. Does your dog’s harness fit correctly???? Bobbie Lyons, Cer CF email: [email protected]  SURFACE is everything folks. When a dog lives most of his life on a slippery surface the dog will continually contract their muscles for balance, traction and stability. The dog will rarely relax when standing and moving on a slippery surface. This over use of the muscles will cause stress to the dog’s joints and surrounding tissue.
Many of us have more EXTREME dogs:
To keep your dog on a stable surface, put carpet runners down, or something that provides traction. If using carpet runners, make sure to put the liner underneath to prevent the carpet from moving as the dog moves over it. In my house I have interlocking mats over my Pergo flooring to help my dogs have better traction, comfort and balance. How about stairs? Carpeted stairs can be as slick as wood stairs. Teaching your dog to walk up and down the stairs slowly at your side is the best way to keep your dog free of injury. You can also teach your dog to back up the stairs. Either walking forward or backward improves limb awareness and core strength if you teach the dog to put one foot on each step. Barreling down the stairs has caused injury to the shoulders, knees and backs of many dogs. When training tricks, K9 Conditioning exercises or any other behaviors be mindful of the type of surface your dog is on. What kind of surface does your dog live on??? Bobbie Lyons Email: [email protected] Website: http://www.pawsitive-performance.com/blog.html |
AuthorBobbie Lyons, CCFT, KPA CPT Archives
April 2019
Categories |
 RSS Feed